

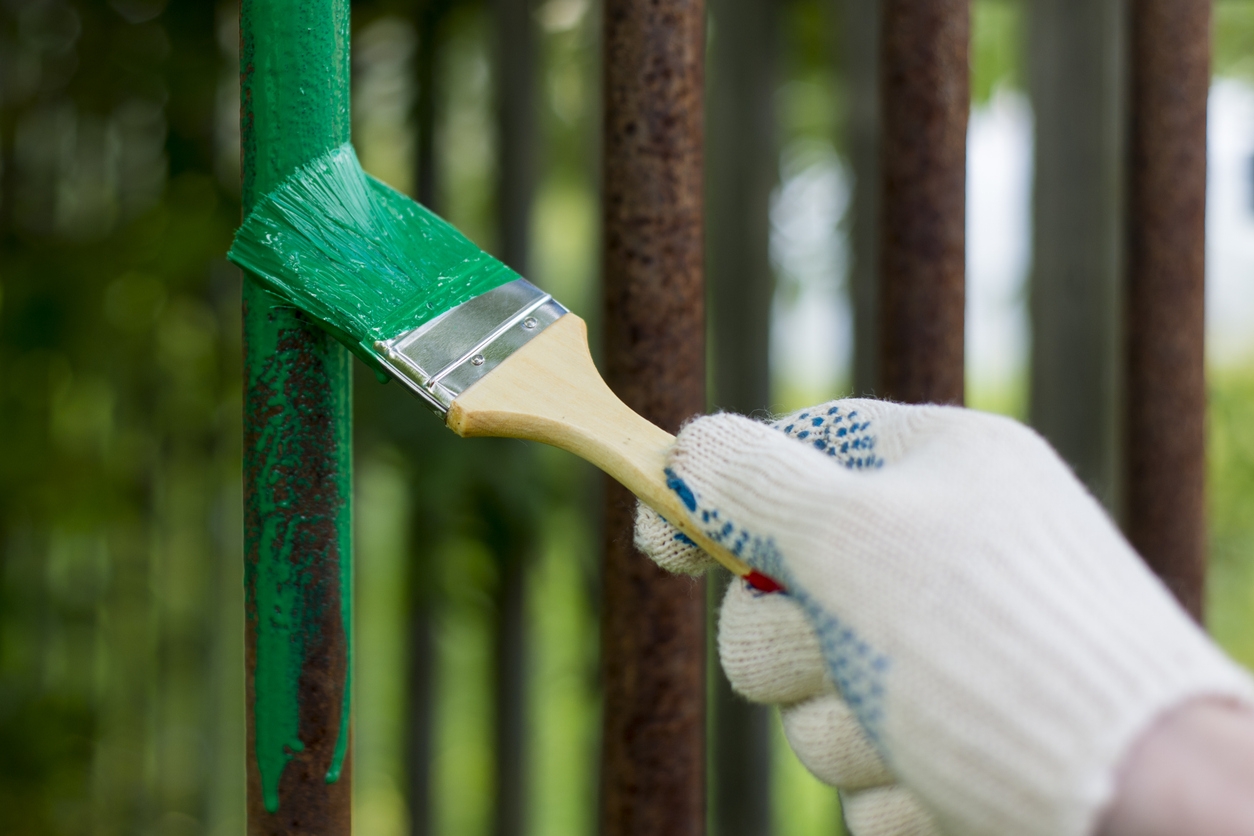
Painting metal surfaces can be a rewarding project that refreshes and protects your items. However, it’s not as simple as grabbing a can of paint and a brush. Before you start, there are several important factors to consider to ensure a smooth and long-lasting finish. In this post, we’ll cover the essential steps and tips you need to know to achieve the best results when painting metal surfaces such as a rusty metal door.
Whether you’re working on a DIY home improvement project in San Ramon or refreshing your outdoor furniture in Danville, these considerations will help you avoid common pitfalls and achieve a professional-looking finish.
Assessing the Metal Surface
Before you start painting, it’s crucial to thoroughly assess the metal surface you plan to work on. This step will help you identify any potential issues and prepare the surface for painting, ensuring a smooth and durable finish.
Identify the Type of Metal
Different metals require different preparation and painting techniques. Common types of metals you might encounter include:
- Steel: Often used in construction and automotive applications.
- Aluminum: Lightweight and corrosion-resistant, commonly found in outdoor furniture and siding.
- Galvanized Metal: Coated with a layer of zinc to prevent rust, frequently used in outdoor structures and roofing.
- Cast Iron: Heavy and durable, typically used in machinery and outdoor furniture.
Knowing the type of metal will help you choose the right primer and paint for the job.
Check for Rust and Corrosion
Rust and corrosion can significantly impact the adhesion of paint. Inspect the metal surface carefully for any signs of rust, which appears as reddish-brown spots, or corrosion, which might manifest as pitting or white powdery deposits on aluminum.
- Light Surface Rust: Can often be sanded off with fine-grit sandpaper.
- Heavy Rust: This may require the use of a wire brush, rust remover, or even sandblasting.
Addressing rust and corrosion before painting is essential to prevent it from spreading under the paint layer.
Evaluate the Surface Condition
Examine the metal for any dents, scratches, or other imperfections that could affect the finish. Smooth surfaces are easier to paint and result in a better-looking final product.
- Dents and Dings: Consider using a filler to smooth out significant imperfections.
- Scratches: Minor scratches can usually be sanded smooth.
Clean the Surface
A clean surface is vital for proper paint adhesion. Remove all dirt, grease, oil, and other contaminants using a degreaser or a mixture of soap and water. For stubborn grease or grime, a solvent like mineral spirits might be necessary.
- Grease and Oil Removal: Use a degreaser or solvent.
- Dust and Dirt: Wipe the surface with a clean, damp cloth.
After cleaning, allow the metal to dry completely before proceeding to the next steps in your painting project.
Choosing the right Paint and Primer
Selecting the appropriate paint and primer for your metal surface is crucial to achieving a durable and visually appealing finish. Each type of metal and environmental condition requires specific products to ensure the best results. Here’s what you need to consider when choosing paint and primer for your project.
Types of Primer
Primers are essential for promoting adhesion and preventing rust and corrosion. Depending on the type of metal and the environment, different primers may be more suitable.
- Rust-Inhibitive Primer: Ideal for ferrous metals like steel and iron, this type of primer helps prevent rust from forming.
- Etching Primer: Contains acid to etch the surface, creating a better bond for non-ferrous metals like aluminum and galvanized steel.
- Universal Primer: Works on a variety of metals, providing a versatile option for mixed-material projects.
Choosing the right primer is the first step in ensuring that your paint adheres well and provides long-lasting protection.
Types of Paint
The type of paint you choose will depend on the metal surface and the intended use of the item. Here are some common options:
- Acrylic Paint: Water-based and easy to clean up, acrylic paint is suitable for indoor projects. However, it may not offer the same durability as other options.
- Oil-Based Paint: Provides a tough, durable finish that is resistant to chipping and corrosion, making it a good choice for outdoor projects.
- Epoxy Paint: Offers excellent adhesion and chemical resistance, ideal for industrial and high-traffic areas.
- Enamel Paint: Known for its hard, glossy finish, enamel paint is perfect for metal surfaces exposed to harsh conditions.
Each type of paint has its advantages, so consider the environment and usage of the painted item when making your choice.
Color and Finish
While functionality is key, the aesthetic appeal of your paint job is also important. Consider the following:
- Color: Choose a color that complements your decor or the intended environment. Darker colors may hide imperfections better, while lighter colors can make items look larger and more open.
- Finish: Paints come in various finishes, including matte, satin, semi-gloss, and high-gloss. Glossy finishes are easier to clean and more resistant to moisture, making them ideal for outdoor or high-use items.
Application Method
The method of applying paint can influence the type of product you choose. Common methods include:
- Brush: Ideal for small or intricate surfaces, but may leave brush marks.
- Roller: Suitable for larger, flat surfaces, providing a smooth finish.
- Spray: Offers a smooth, even coat without brush marks but requires careful masking and ventilation.
Choosing the right application method ensures a professional-looking finish and efficient use of your materials.
Surface Preparation
Proper surface preparation is a crucial step in painting metal surfaces. It ensures that the paint adheres well and provides a smooth, long-lasting finish. Here’s how to prepare your metal surface for painting.
1. Cleaning the Surface
The first step in surface preparation is cleaning. Any dirt, grease, oil, or other contaminants can prevent paint from adhering properly.
- Remove Grease and Oil: Use a degreaser or a solvent like mineral spirits to remove any grease or oil. Wipe the surface with a clean cloth to ensure it’s completely free of contaminants.
- Wash the Surface: Clean the metal with soap and water to remove dirt and dust. Rinse thoroughly with clean water and allow it to dry completely.
- Dust and Dirt: After cleaning, wipe the surface with a clean, damp cloth to remove any remaining dust.
2. Removing Rust and Corrosion
Rust and corrosion can cause paint to peel and flake, so it’s essential to remove any existing rust before painting.
- Light Rust: Use fine-grit sandpaper to sand off light rust. Make sure to sand until the bare metal is exposed.
- Heavy Rust: For heavier rust, use a wire brush, rust remover, or sandblasting. Ensure that all rust is removed before proceeding.
3. Sanding the Surface
Sanding the metal surface helps create a rough texture that allows the primer and paint to adhere better.
- Smooth Metals: Use medium-grit sandpaper (around 120-grit) to sand the surface lightly. This will create tiny scratches that help the primer bond to the metal.
- Rough Metals: If the metal is already rough or has been heavily rusted, use coarse-grit sandpaper (60 to 80 grit) to smooth out any imperfections.
4. Applying Rust Converter (if needed)
If the metal surface has rust that can’t be completely removed, consider using a rust converter. This product chemically converts rust into a stable compound that can be painted over.
- Apply Rust Converter: Follow the manufacturer’s instructions for applying the rust converter. Typically, it is applied with a brush or spray.
- Allow to Dry: Let the rust converter dry completely before proceeding to priming.
5. Priming the Surface
Primer is essential for creating a bond between the metal and the paint. It also helps prevent rust and corrosion.
- Choose the Right Primer: Select a primer suitable for the type of metal you are working with (e.g., a rust-inhibitive primer for steel).
- Apply Primer: Apply a thin, even coat of primer using a brush, roller, or spray. Follow the manufacturer’s instructions for drying times and the number of coats.
- Sand Between Coats: If applying multiple coats of primer, lightly sand the surface between coats to ensure a smooth finish.
6. Final Cleaning
Before applying the paint, ensure the surface is clean and free of any dust, dirt, or grease.
- Wipe the Surface: Use a clean, damp cloth to wipe down the surface one last time.
- Let it Dry: Allow the surface to dry completely before painting.
By thoroughly preparing the surface, you ensure that the paint will adhere properly and provide a durable, attractive finish. Proper preparation can make the difference between a paint job that lasts for years and one that quickly deteriorates.
Painting the Metal Surface
Once the metal surface is properly prepared, the next step is painting. Applying the paint correctly is essential for achieving a smooth, durable finish that will protect the metal and enhance its appearance. Here’s how to paint your metal surface effectively.
Choosing the Right Tools
The tools you use can impact the quality of your paint job. Depending on the size and shape of the metal surface, you might need different tools:
- Brushes: Ideal for small or intricate surfaces. Choose high-quality brushes to minimize brush marks.
- Rollers: Suitable for larger, flat surfaces. Use a roller with a short nap for a smooth finish.
- Spray Paint: Provides an even, smooth coat and is great for complex shapes. Ensure proper ventilation when using spray paint.
Preparing the Work Area
Set up your workspace to ensure a clean and efficient painting process.
- Ventilation: Ensure adequate ventilation, especially when using spray paint or oil-based products.
- Cover Surroundings: Use drop cloths or plastic sheets to protect the surrounding area from paint splatters.
- Safety Gear: Wear protective gear such as gloves, goggles, and a mask to protect yourself from fumes and paint.
Applying the Paint
The technique you use to apply the paint is crucial for a smooth, even finish.
- First Coat: Start with a thin, even coat of paint. Avoid overloading the brush or roller, as this can lead to drips and an uneven finish.
- Brush or Roller: Apply the paint in long, smooth strokes, working in one direction to avoid visible brush marks.
- Spray Paint: Hold the can about 10-12 inches from the surface and use a sweeping motion to apply a thin, even coat.
Drying and Additional Coats
Allow each coat of paint to dry thoroughly before applying the next. This ensures a smooth, durable finish.
- Drying Time: Follow the manufacturer’s instructions for drying times. Typically, allow at least 24 hours between coats.
- Second Coat: Apply a second thin coat for better coverage and durability. Repeat the process as needed until the desired finish is achieved.
- Light Sanding: For an ultra-smooth finish, lightly sand the surface with fine-grit sandpaper (320-grit) between coats.
Finishing Touches
Once you have achieved the desired number of coats and the paint is completely dry, it’s time for the finishing touches.
- Inspect the Surface: Check for any missed spots or uneven areas and touch up as needed.
- Sealant (Optional): For additional protection, especially on outdoor items, consider applying a clear sealant over the painted surface. Follow the sealant manufacturer’s instructions for application and drying times.
Cleaning Up
Proper cleanup is essential to maintain your tools and ensure safety.
- Brushes and Rollers: Clean brushes and rollers immediately after use with the appropriate solvent (water for water-based paints, mineral spirits for oil-based paints).
- Spray Paint Cans: Dispose of empty spray paint cans according to local regulations.
- Work Area: Remove protective coverings and clean up any paint splatters.
By following these steps, you can achieve a professional-looking paint job that enhances the appearance and longevity of your metal surfaces. Proper painting techniques not only improve aesthetics but also provide crucial protection against the elements, ensuring your project stands the test of time.
Common Mistakes to Avoid
Even with careful preparation and execution, it’s easy to make mistakes when painting metal surfaces. Here are some common pitfalls to watch out for to ensure your project turns out beautifully.
- Skipping Surface Preparation: Neglecting to properly clean, sand, or prime the metal surface can lead to poor paint adhesion and a shorter lifespan for your paint job. Always take the time to prepare the surface thoroughly.
- Using the Wrong Primer or Paint: Choosing a primer or paint that’s not suitable for metal or the specific type of metal can result in peeling, flaking, or rust. Make sure to select products designed for the material and conditions.
- Applying Too Much Paint at Once: Thick coats of paint can lead to drips, uneven coverage, and longer drying times. Apply multiple thin coats, allowing each layer to dry completely before adding the next.
- Ignoring Drying Times: Rushing the drying process between coats can cause the paint to smudge or not adhere properly. Always follow the manufacturer’s recommended drying times for both primer and paint.
- Inadequate Ventilation: When painting indoors, especially with spray paint or oil-based products, poor ventilation can lead to health hazards. Ensure your workspace is well-ventilated and use protective gear.
By avoiding these common mistakes, you’ll achieve a smoother, more durable finish on your metal painting projects. Taking the time to do it right ensures lasting results and a professional appearance.
Conclusion
Painting metal surfaces can transform and protect your items, but it’s important to follow the right steps for the best results. From thorough surface preparation to choosing the right paint and primer, each step plays a crucial role in achieving a smooth, durable finish. Avoid common mistakes to ensure your project stands the test of time.
For professional assistance, contact Custom Painting, Inc. at 925-866-9610 or fill out our contact form. We’re here to help with all your painting needs.